Openwrt Resize Ext4 Storage
When we configured Raspberry Pi As OpenWrt Router, we had used FACTORY (SQUASHFS) as the openwrt image (Step 3 in Raspberry Pi As OpenWrt Router). You might have noticed even though the microsd card had a much bigger capacity(16gb in my case), but what was actually available for openwrt (~250mb in my case) was much lower storage.
This is because openwrt is bundled to work on lower memory footprint devices too. In this article, I have detailed how we can resize the microsd card to utilize the entire capacity for our openwrt setup.
TABLE OF CONTENTS:
HARDWARE:
- USBC/USB2 to microSD card reader. This is optional. This specific device is compatible with Mac, Windows and Linux.
🔝
SOFTWARE:
- Virtual Box - To create Ubuntu VM
🔝
STEPS:
Instead of following the Step 3 from Raspberry Pi As OpenWrt Router. We will execute below steps.
Step A:
After adding the additional package, click on REQUEST BUILD (it takes few seconds to get custom build ready). Now, download the firmware by choosing FACTORY (EXT4) option. This will download *.img.gz file. Unzip the file, and flash the image to the microsd card using etcher.
🔝
Step B:
Now connect the microSD card(I used the above mentioned card reader as the one which I had wasn’t getting detected in Ubuntu) to a Ubuntu machine OR to any machine that is running Ubuntu VM (it’s much easier to resize the EXT4 storage on linux systems).
I have Ubuntu VM on Virtual Box that is running on my MacBook (host).
Note: Make sure when starting Virtual Box on your host machine(Mac OS in my case), it’s started with sudo permission. Without this, the Ubuntu VM will not be able to detect the microSD card. After installing Virtual Box, you can start it in sudo level by running the below command from terminal
sudo virtualbox &
This should start the Virtual Box on your machine with sudo permission.
🔝
Step C:
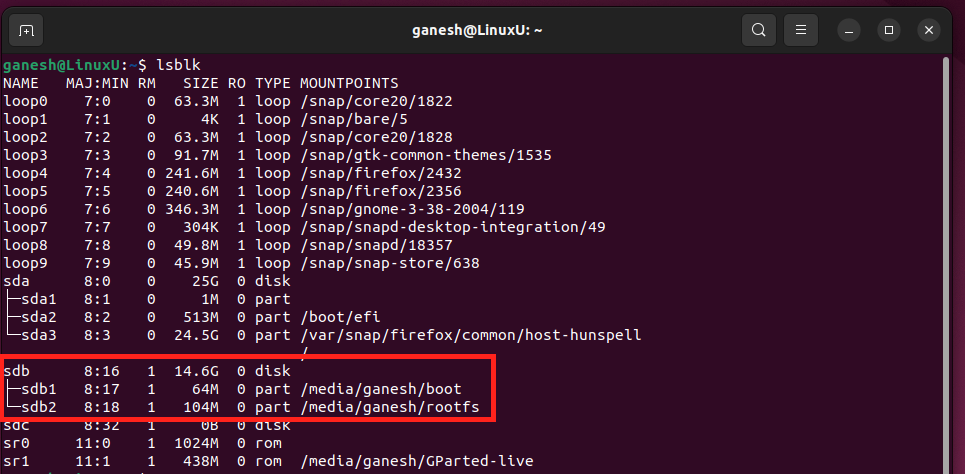
Open terminal and run the below command - lsblk. Below is the highlighted entries that is associated with the microsd card.
🔝
Step D:
Now, let’s unmount the the rootfs partition. This is needed because we are going to resize this partition. Run this command to unmount - sudo umount /media/ganesh/rootfs. Enter the password when prompted.
🔝
Step E:
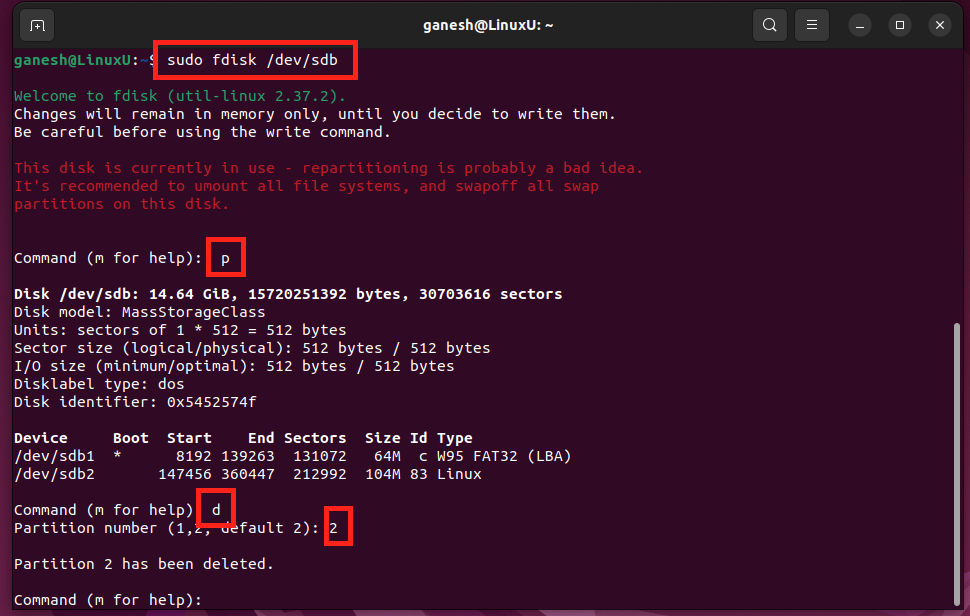
Let’s run this command - sudo fdisk /dev/sdb. Then at the prompt press p then press d, then press 2. This should result in deleting the 2nd partition. So far it should look like below:
🔝
Step F:
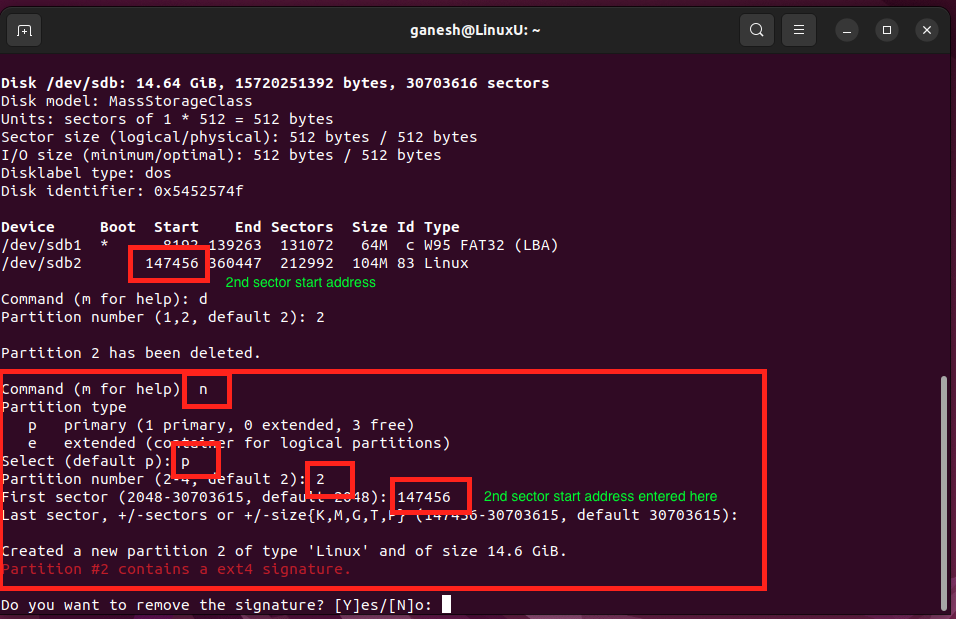
Now at the same prompt, press n for new followed by p for partition. Now press 2 for choosing 2nd partition. Now enter the sector address where the 2nd partition starts i.e. where 1st partition ends. I have highlighted that address in the below screenshot. In this case it’s 147456, enter that in the prompt. Then at the next prompt don’t enter anything as we want to use the entire storage available in the microsd card. It should look like this:
🔝
Step G:
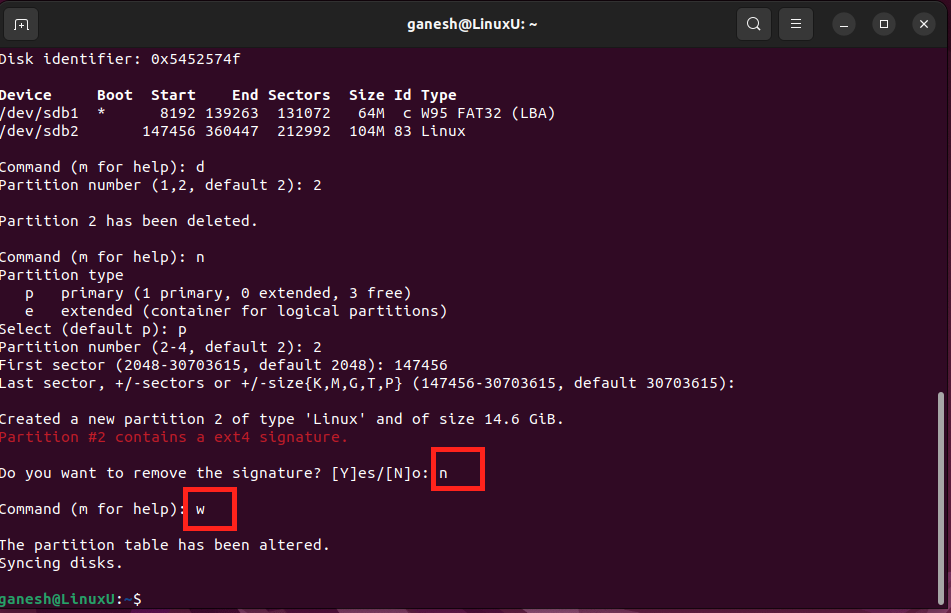
Now press n for no and then w for write. This will get us out of the prompt. It should look like this.
🔝
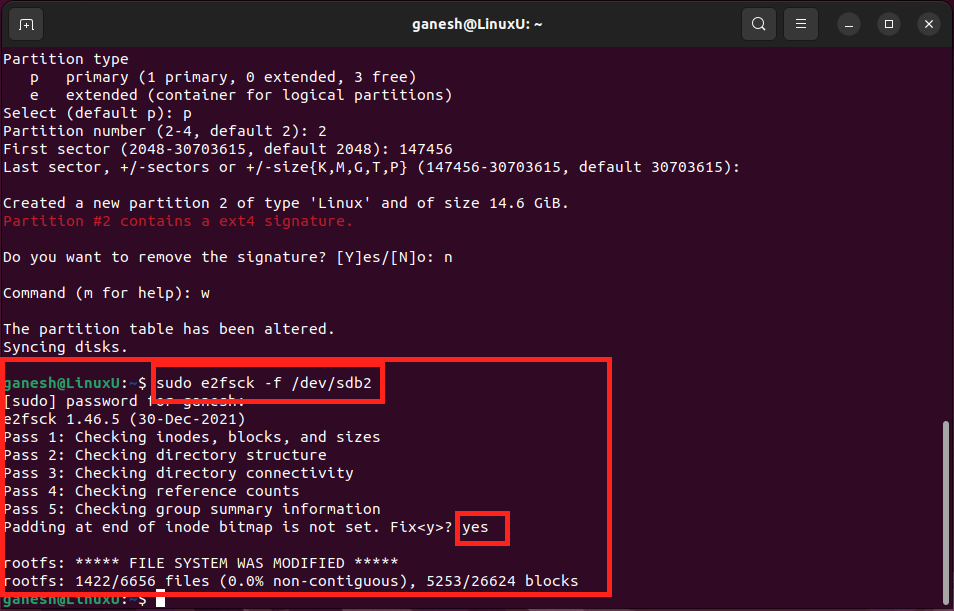
Step H:
Now type the command - sudo e2fsck -f /dev/sdb2. This is for clean up activity. Now press y to remove padding. It should look like this.
🔝
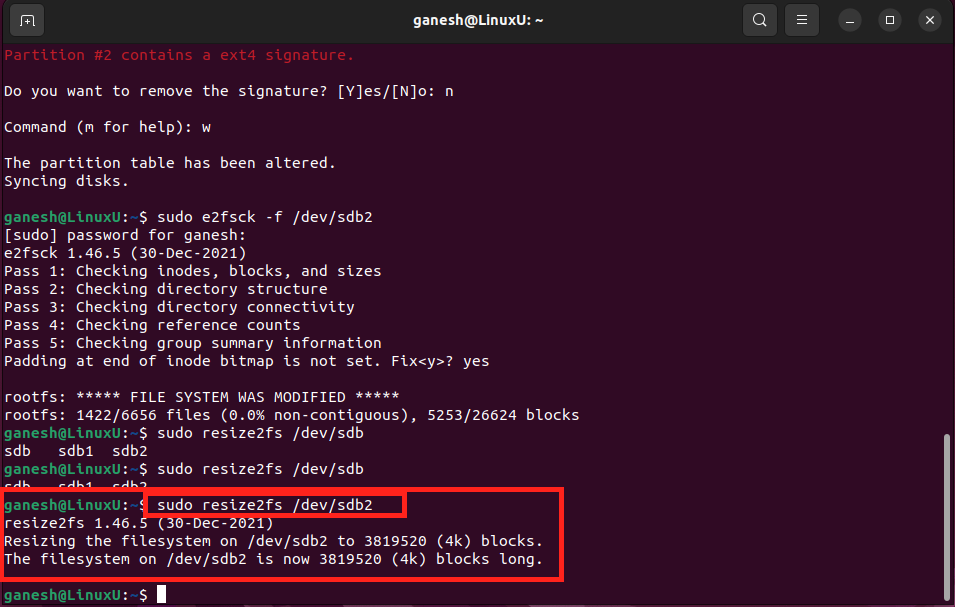
Step I:
Now run the command to resize - sudo resize2fs /dev/sdb2. The resize is complete.
🔝
Step J:
Now run this command to unmount the microsd card - sudo umount /dev/sdb1. Remove the microsd card from the laptop and insert the microsd card in Raspberry Pi, connect the external LAN dongle to USB3 port and power it ON.
🔝
Next Step:
Now go back to Step 4 in Raspberry Pi As OpenWrt Router and complete the rest of the steps.
🔝